Category: Flash


We’re going to take a look at a LEGO game creator that is hosted over at Miniclip. The game creator is built in Flash and outputs Flash based games. The game creator itself is pretty basic and for the most part consists of stringing together predefined levels into a new game. There doesn’t seem to be a way to build your own levels. You should be able to build and play games from this game creator on your Android device with the Flash Player.

There are three steps to this game creator. The steps are Make Your Level, Make Your Dice, and then Play Your Game. You can also share the game that you create with your friends. The games that you can create with this game maker tool are run and jump platformer games. You can only customize about 5% of the game in this game creator (mainly stringing levels together). You can also customize what the dice does (which acts as a powerup) on the second step of the game builder. There is no ability to customize the graphics or upload your own graphics with this game builder. However, this build your own game tool is free so that is a plus. For a game builder tool where you can upload and customize your own graphics you can make your own game for free with Pulado.

Make Your Own Lego Game 1

You first choose the Make option which allows you to drag and drop 5 levels into a string of levels at the bottom of your screen. You get to choose levels from 3 different LEGO themes. The themes are based on the LEGO board games that you can build and play yourself. They are Minotaurus, Atlantis Treasure, and Pirate Plank. As you might have guessed these themes are based on the minotaur Greek myth, the Atlantis myth, and of coarse pirates. The 5 different levels that you drag together creator one long level with no loading screen between. You seamlessly transition from one level to the next. There are about 30 different levels to choose from total which means there are way over 900 different combinations for you to choose from.

Build Your Own Game 1


In the next step of this LEGO game creator you get to choose what the dice powerup will do. The dice has six sides and you place a different powerup on each side of the dice. You can also click the auto fill button which will random place powerups on all six sides of the dice. The powerup options for you to choose from are “Next room, double coins”, “20 bonus coins”, “10 bonus coins”, “1 extra life”, “Rewind time 10 seconds”, “Rewind time 5 seconds”, “Lose 10 coins”, and “Lose a life”. Once you drag a powerup into each of the 6 slots on the dice you can move on to testing your game.

Make Your Own Lego Game 1


The last step in this game builder is to actually play and test your game to make sure that it is fun. You can always go back and re-arrange the levels and update what powerups are on the powerup dice as well. You can also share your game at this point with your friends. The are option lets you send a code to your friends (and of coarse the URL for the game builder). They can come to the game builder and unlock your game with the special code.

Lego Game Maker


And that is all there is to it. The LEGO games that you create with this tool are pretty fun platform games where you dodge enemies, pick up coins, collect powerups, and more. What are you waiting for? Get started making your own LEGO game by clicking here.

In this post we’ll look at making your own Batman games. We’ve posted about two other game creators provided by the Cartoon Network and this is the third and final game creator that they have to play with. The Batman game creator is built in Flash and publishes games out to Flash as well which means it should also work on Android devices. The other two game builders they offer are for Ben 10 games and Star Wars games.

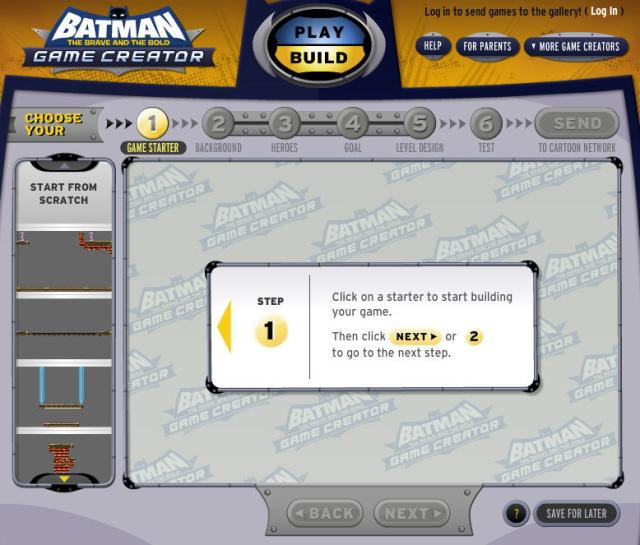
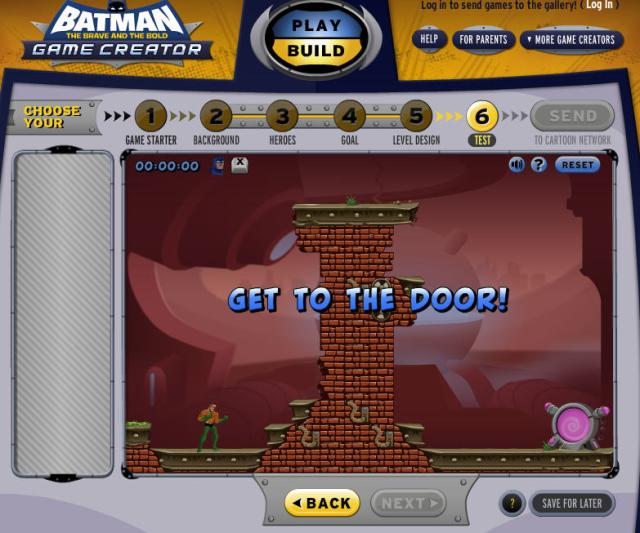
The Batman game builder is broken up into six easy steps which starts with the Game Starter section and ends with testing your game. The steps are Game Starter, Background, Heroes, Goal, Level Design, and Testing. After all steps are complete you publish out your game for other people to play. Similar to all of the other game creators offered by Cartoon Network and Nick.com there is only about 5% customization available to the person creating the game. There is no ability to upload any custom graphics at all. If you want a game creator that you can upload your own custom graphics you should make your own game with Pulado.

In the Game Starter section you choose from a list of pre-created level designs to start your level with. Next up in the Background section you choose a background that goes with the game level that you chose in the Game Starter section. There are a variety of different colors which allows you to generate themes like underwater or in the forest or in a sewer. There are probably ten or so level setups to choose from in the Game Starter section and about the same amount of backgrounds to choose from as well.

Once you have selected those two you can move on to the Hero section where you select your player character. You get to choose from Blue Beetle, Green Arrow, Aquaman, and Red Tornado. The character you choose becomes your main character and then you have the option during the game to switch your character main to Batman and back again using the X button (it is sort of a sidekick system).

In the Goals section you can choose one of four goals which are Get To The Door, Collect All Orbs, Battle All Enemies, and Collect All Orbs And Battle All Enemies. They are pretty self explanatory and depending on which you choose it lets you place a door, enemies, or orbs throughout your level. When you first click it automatically places the items on the map so you don’t have to move them unless you want to.

In the Level Design section there are different wall and floor sections you can use to customize your grid based map. You can also add additional hazards, and more objects like orbs. Lastly you can erase parts of your level and add water to your level for the character to swim through. Once you are finished with the Level Design section you can move on and test your game. If you aren’t happy with the result you can go back and continue to customize your game.

That’s all there is to it. Once you are finished with your Batman game you can publish it to to their site for everyone to play. Go start making your own Batman game here.

So here is another game creator from the Cartoon Network where you can build games based on the Ben 10 franchise. The other game creator that Cartoon Network has plugged into this same system are a Star Wars game creator and a Batman game creator. The Ben 10 game creator is probably the best of the bunch. The Ben 10 game builder is built in Flash and publishes games out as Flash as well which means they can be built and played on Android devices.

The Ben 10 game builder’s first option is where you can choose a pre-created level template from a list of different levels. There are quite a variety of levels in all different colors and configurations available. One interesting thing about it is that the levels are mainly contained within the viewable screen and don’t scroll off in other directions. This makes for a compact level which is easy to setup and tweak to your liking. It isn’t possible to add any custom graphics to the Ben 10 game builder but they do provide quite a variety of different hero characters, levels, and backgrounds.

The game create is broken up into a number of different steps which are:

  1. Game Starter
  2. Background
  3. Hero
  4. Goal
  5. Level Design
  6. Test

The Game Starter kind of sets the tone for your level because it has a color them too it. Then on the next step which is the Background section you can choose either a background with a matching color or a background with a contrasting color to make the level pop out at the player. The next step is where you can choose a hero character. There are 10 different heroes to choose from in this game builder and that is a pretty big variety of different characters (if you want to build your own game and want to be able to upload your on custom characters you could try the game builder on Pulado.com). Each of the different hero characters have a different movement and fire characteristic so for example the spider monkey hero top shoots a web and can cling to walls.

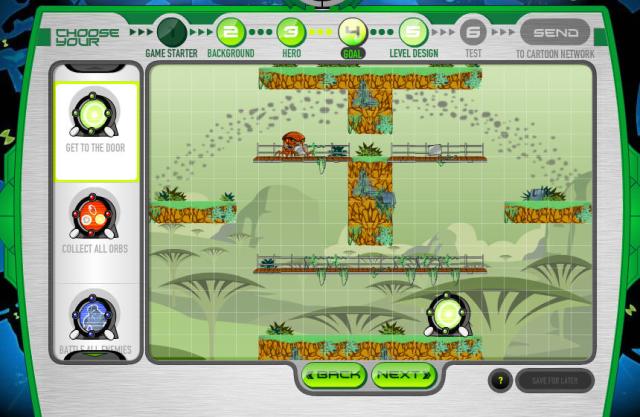
The next area is where you choose a Goal for your game from a number of different goals. There is “Get To The Door”, “Collect All Orbs”, “Battle All Enemies”, and “Collect All Orbs And Battle All Enemies” to choose from. When you choose Get To The Door you can choose where to place the door. The other three options are similar and you get to choose where to place the enemies and the orbs.

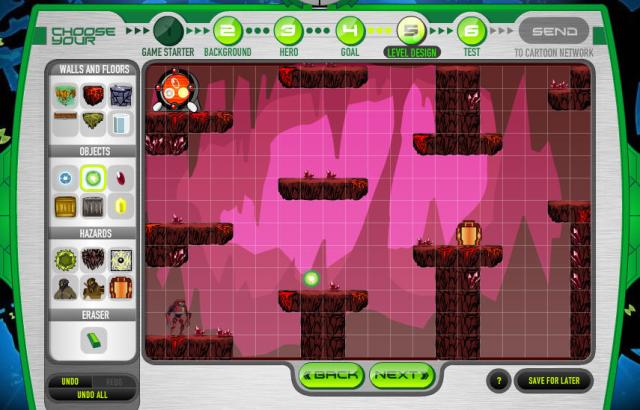
Moving on in the Level Design section you get to enhance the existing level design with various things like enemies, enemy spawn boxes, orbs that can be collection, lava, additional wall and floor pieces, and a few other items. It also comes with an eraser if you want to remove items on the map. And lastly you can test your map.

That is all there is to it to build your own Ben 10 game with this game builder. Head over here and start building a game now.

Nick.com has a whole bunch of these build your own game creators based on various properties they have like Spongebob and iCarly. The game creator we will be focusing on for this post is their ‘The Last Airbender’ game creator. The game builder is built in Flash and it publishes out to a Flash client as well which means you could built and play these games on your Android devices (a tablet would probably be better than a phone because of the bigger screen size). The game builder doesn’t allow you to customize any of your own graphics for the game but it does lead you through six steps to building and publishing your game. You can only provide about 5% of the actually game with 95% of the game being provided for you. The six steps to create a game with this game creator are World, Level, Hero, Music, Goal, and Builder.

In the World tab you can choose from various environments from the movie including a snowy land and three other various mountain lands. Whatever one you choose becomes the background of your game. It also handles it’s own parallax which means there are three layers in there but that is all handled internally inside the game engine so you don’t have to setup all three of the layers yourself. With the Pulado create your own game engine you can control all three layers for a parallax. The next section is the level section where you choose from 5 different maps that are pre-built. Once you choose a level you can then choose one of four heroes from the Hero section. On the next tab after that you choose one of four music tracks for your level.

And of coarse the fifth tab is the Goal tab where you can choose what you would like the goal of the level to be. Your choices are Reach the Door, Collect them All, and Defeat All Enemies. They are pretty self explanatory. Reach the Door lets you drop a door on your map and the player has to get to the door to win. Collect them All requires that the player collect all of the items that you designate for them to collect. When you choose this option it creates a bunch of random items on the map for you. And finally Defeat all Enemies means you must destroy all of the enemies on the map to beat the level. When you choose this option it creates a bunch of random enemies on the map for you to defeat.

Finally there is the Builder tab where you can complete customizing your game. You can add on to the existing level by adding new walls, floors, decorations, and enemies if you want to. You can also choose where you want the player character to start the  game. You can zoom in and out to make it easier to edit the map as well. You can test your map here as well to see how the level plays and if it still needs tweaking you can come back and tweak the map some more before publishing it. Once you have your map exactly how you like it you can publish it and other people will be able to play it.

Head on over and start build your own flash game based on ‘The Last Airbender’ here.

UMapper GeoDart is an easy way to make your own geography trivia games. They plug into a bunch of different map APIs like Google and Bing which you can then use via a WYSIWYG interface to create map trivia games. You can create the games using their Flash client and then the map games publish out as Flash games which means you can embed them around the web. One other interesting thing they included was an Export To Actionscript button which gives you all the AS3 source code you would need to include that exact same map you just built into your own Flash game. Because the output for these games is in Flash you can also play them on Android devices but they also appear to have an HTML5 version which is embedable via an IFRAME.

Using their game creator (which looks like it is built in Flex) you basically drag and drop points on a map and then you add names to those points and a question in the description field for that point. The game client will then ask that question of the user and it is up to the user to click on the map and find the point that the question asked about (an example would be Where is London? and then the user has to click in London on the world map to answer it correctly). You have a limited amount of time to answer each question (which is configurable). The closer on the map to the correct answer the more points you receive. If you are looking to create a more interactive arcade style game you might build your own game using Pulado.

Head over to UMapper GeoDart and start building your own geography trivia games by clicking here.
Honey Nut Cheerios partnered with Nick.com to create their own “build your own” Honey Nut Cheerios game. It is in the same spirit as the game builders for Spongebob and iCarly that we have posted about before. The game creator is built in Flash and outputs a Flash game as well which means it is playable on the web and on Android devices. I guess you could also build your own game with it on an Android tablet device. In any event the mechanics for building the games with the Honey Nut Cheerios game creator are pretty simple. There are 6 easy steps to building your own game with it but the drawback is that there isn’t any way to include your own custom graphics or custom anything really. They probably give you 95% of the game and you provide the other 5%.

The game builder itself is broken up into 6 different tabs which are World, Level, Hero, Music, Goal, and Builder. On the World tab you choose a background for your game where your bee will fly around. In the Level section you choose from one of 6 pre-created levels that your player can walk on. In Hero you choose one of three player characters (honey bees) that you play.

Music lets you choose one of 5 music tracks to play in the background of your game. Goal is an interesting tab because it controls how and why people should play your game. You can choose one of three available goals which are Reach the Door, Collect them All, and Defeat All Enemies. Unfortunately as previously stated there is no way to add your own graphics but you could use the Pulado make your own games creator which allows you to do that (just not with Honey Nut Cheerios characters).

Lastly on the Builder tab you can customize your level by adding or removing Enemies, Floors & Walls, Bonuses, and other random objects. One you’ve tweaked your game how you like it you can use the Test It button to go play your game and see if it is fun. If you have any changes you can come back and edit your game before publishing it live.

If you want to make your own game using the Honey Nut Cheerios game creator head here.

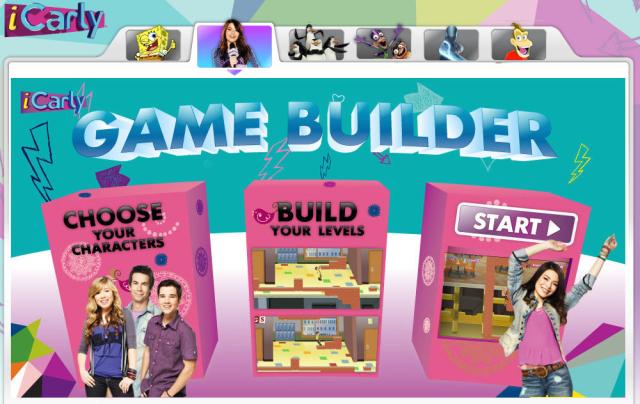
Over on Nick.com they have a game creator where you can build your own iCarly game for free and then send it to other people to play. The kind of game that you can build is pretty limited but overall it is fun to try at least. The games that you build in the iCarly game build are side scrolling platform games similar to Mario but it also is vertical than horizontal.This game builder is very similar to the Spongebob Squarepants game builder which is also offered by Nick.com. The game builder itself is built in Adobe Flash and it outputs to Flash as well which means you could build games with it on your Android tablet and you could also play the games on any Android device.

Creating your game is broken down into 6 different steps. The first step is where you select your World which is basically what background do you want to use for your game. The next step is selecting the level itself. You can choose from a limited selection of pre-created levels. Maybe at some point you can also create your own levels instead of just choosing from 4-6 templates but that option isn’t available for first time users.

After you choose your level template you move on to choosing your hero graphic and what music you would like your game to have. There are four heroes to choose from and five music tracks. Moving on you are now on the Goals section where you can choose what the player will need to do to complete the level. You can choose from “Reach the Door”, “Collect Them All”, and “Defeat All Enemies”. Lastly you end up on the Builder section where you can customize your level to some extent by adding in props, enemies, bonuses and extra walls if you want them.

There is no way in this game builder to upload your own custom graphics or content which is pretty limiting overall (if you want a game creator were you can use all of your own graphics you can make your own games with Pulado). Over 52,000 levels have been built with the iCarly game builder which is a pretty big number of games.

If iCarly is your thing or you just want to check out building your own game levels give this a go here!


So you’re looking to build your own pirate ship game? Over on Pulado there is a pretty fun way for you to do that using an existing game template. So let’s get started. If you don’t currently have an account you will need to make one and then head to the members area. Once there you should choose the New Game button and then choose the Pirate Ship template. Fill in a name, description, and some tags for your new game then then click Save. You can now start editing this game template and customizing it. The game that you publish will be playable on the web and also on Android devices (not to mention the Wii).

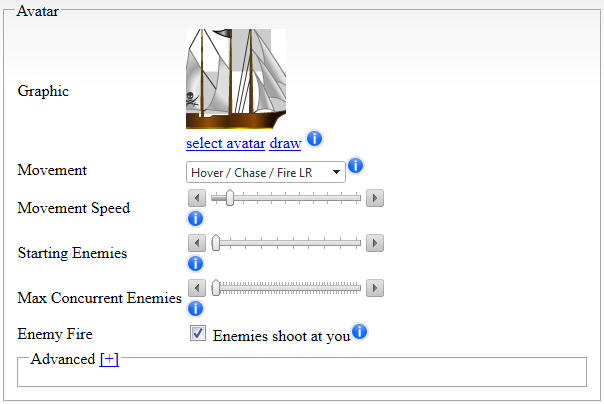
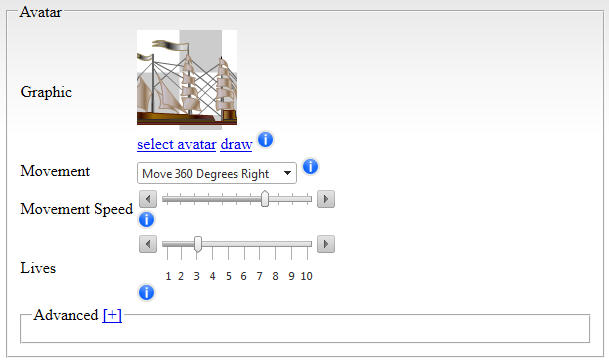
Select your game and you will end up at the Preview screen. You can play your game here and then each time you make a change to your game you can test it again in real time to see how your changes turned out. The first tab we want to take a look at is the Player Tab so go ahead and open that up. On the Player tab you can customize the graphical avatar that is usable for your character in addition to a bunch of player settings like movement speed and the amount of lives that a player has. The player movement type is set to Move 360 Degrees Right which is the right setting for this type of game because the ship sits right to left. There are other settings that affect this as well on the Gameplay Tab and we will get to them later.

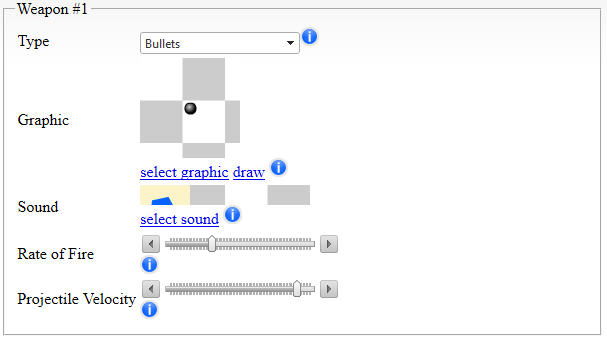
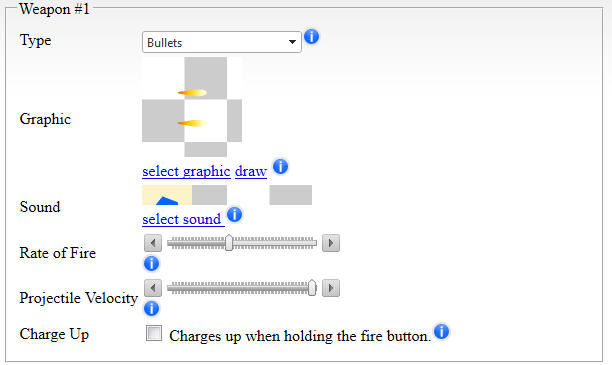
If you scroll farther down on the Player Tab you will get to the Weapon #1 and Weapon #2 section for the player. The weapon graphic is setup here and currently set to a cannon ball graphic. You can also customize the sound the weapon will have when it fires, the rate of fire, and the projectile velocity. You can also change the type of the weapon but for now we can leave it on Bullet. Weapon #2 has all of the same options as Weapon #1 except that Weapon #2 is kind of a mega weapon that when you fire it will clear the screen. Let’s move on to the Opponent tab now where we can customize the opponent settings. Make sure that if you made any changes on the Player tab that you click the Save button at the bottom.

On the Opponent Tab you can customize the look of the opponents, their speed, and how many will spawn at the start of the game. The opponent Movement type is also set here and it is set to Hover / Chase / Fire LR which means that the opponent ships will chose the player around and will fire to the left and the right. Now with this opponent we also have an option in the Advanced section checked which is set to Multiple Enemies. The Multiple Enemies option means that the opponent graphic is setup with one enemy movieclip on each keyframe. The Pulado engine (which is what you are using to make your own games) will randomly choose a movieclip from the total amount of keyframes and use that each time a new enemy spawns. You can also limit how many enemies can be on the screen at the same time here using the Max Concurrent Enemies option.

If you scroll farther down in the Opponent tab you can setup the Weapon #1 and Weapon #2 for the opponent as well. These options are the same as you setup for the player on the Player tab. You can change the graphic, sound, rate of fire, projectile velocity, and projectile type. Choose the Missile type if you want smoke particle effects. The Weapon #2 for the Opponent is not a mega weapon however. It just fires to the sides of Weapon #1 depending on the game difficulty. If you made any changes on this tab you should click the Save button at the bottom.

After you save the Opponent tab you should open the Background tab so we can see how the level itself is built. On the Background tab there are four layers. A Top layer above everything else where you could put clouds or fog. A Ground layer where the islands for this game are. A Background Accessories layer which is below everything and a far Background layer which is at the very back. In our case the far Background layer contain some water, the Ground layer contains some islands, and the top layer contains some fog. The graphic in the Ground layer is used for the player and enemies to collide against and in this case it is a set of islands that the player has to navigate around. If you make any changes here make sure to click Save at the bottom.

The next tab we want to look at for this game is the Gameplay tab. There are a lot of features on the Gameplay tab but the important ones for this game are in the Gameplay section. You will want the Projectiles collide with the ground to be checked so that cannon balls can’t shoot through the islands.

In the Player Modifier sections of the Gameplay tab you will want the Mirror Move and the Mirror Fire settings to be turned on. Mirror Move should be set to Flip Left and Right which means that when you move left and right the graphic of the player will flip in that direction so it is always pointed in the direction that you are moving your ship. For Mirror Fire you want Flip Left or Right and Up or Down to be selected so that in any direction that you move it will fire in all four of those directions.

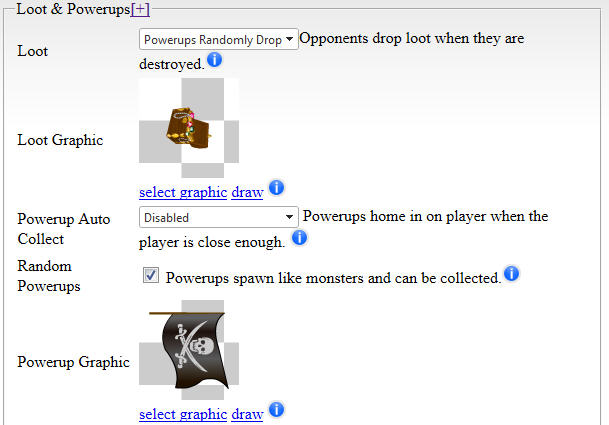
In the Loot & Powerups section of the Gameplay tab you can configure the graphic that will drop as look when opponents are destroyed and you can also configure the graphic that will be used for powerups. The graphic that you choose for the powerup will have a letter overlayed on top of it to show which type of powerup it is.

That is it for the Gameplay tab. There are lots of other options like the amount of hit points that the player and the opponent has and how many opponents must be destroyed before it moved onto the next level here so make sure you explore them. If you make any changes be sure to click Save at the bottom. Lastly we have the Powerup tab which is where you can control which types of powerups will drop when opponents are destroyed. In this case things like MultiFire and Point Bonus powerups are checked.

And that is pretty much all there is to it to create your own game online with pirate ships using this template. There are lots of options for you to tweak and it is up to you to make a fun game out of all of the options that are available. You are the game designer. The final game is shown below.

So that was pretty easy as far as making a game with pirate ships goes right? We’d love to see what changes you could make to this game like giving it different weapons, sounds and more. This template game only has one level but you could add all kinds of new levels with different island configurations too.

Head over to Pulado and start building your pirate ship game today!

R-Type is a classic arcade game where you are a space ship flying in a side view and you blow up all kinds of enemy baddies. R-Type games are in the side scrolling shoot em up genre of games or shmup for short and they are also known as bullet hell games because there are so many projectiles flying around. In this blog post we’re going to show you how to build a similar game using the Pulado make your own games engine. Pulado games can be built and played within the browser and use Adobe Flash as the game client. If you don’t already have an account head over to Pulado.com and create an account and then get to the members area.

Once in the members are you should click New Game and then select “Side Scroller Template” from the template list. Fill in the name, description, and tags for your game in the relevant fields and then click Save. The theme of this template is WWII and not space but it is a side scroller like R-Type. The settings that make it this way are located in the Player Tab and the Opponent Tab mainly.

If you select the Player tab you will see where the player avatar graphic is configured but the main setting here is the Movement setting. You want”Move 360 Degrees Right” which will allow your plane to move and fire to the right. There are a lot of other settings here you can configure like the movement speed of the player and how many lives they should start the game with. You can also scroll farther down and configure the Weapon #1 and Weapon #2 rate of fire, sound, graphic, and projectile velocity. There are other posts here which explain those features in more detail.

On the Opponent tab you want to select “Spawn Right and Move Left” as the movement type. This will make the enemies spawn on the right side of the screen and fly to the left side of the screen (towards the player). They will also fire in that direction. Also on this tab you can change the enemy graphics, the enemy movement speed, and the two weapons that the enemies can have. Additionally, you can choose to have multiple graphics for the enemies (it randomly picks a graphic to use for that enemy each time an enemy spawns). The weapons are is very similar to the player weapons area where you can set the rate of fire and the projectile velocity.

On the Background Tab you can setup the different background layers behind (and above) the player. You can also set the backgrounds to different speedswhich creates a parallax. The scrolling background is a signature feature of R-Type like games. The other relevant tabs which you can also explore to tweak out your game are the Gameplay tab and the Powerup tab. On the Gameplay tab you can configure bosses, hitpoints, and loot among other things. On the Powerup tab you can control which powerups will drop like Rapid Fire and Multi Shot.

And that is all there is to it to start creating your own game like the classic R-Type side scrolling shoot em up. Head over to Pulado and start to make your own game now!

So you’re looking to build a game similar to 1942 right? Well with Pulado it is pretty easy to build a scrolling shoot ’em up (aka shmup) like this. Games like this are also called bullet hell games because there are so many bullets flying everywhere. Pulado comes with a simple template called Epic Dog Fighter which contains all of the ingredients for you to create a similar game and then tweak out to your hearts content.

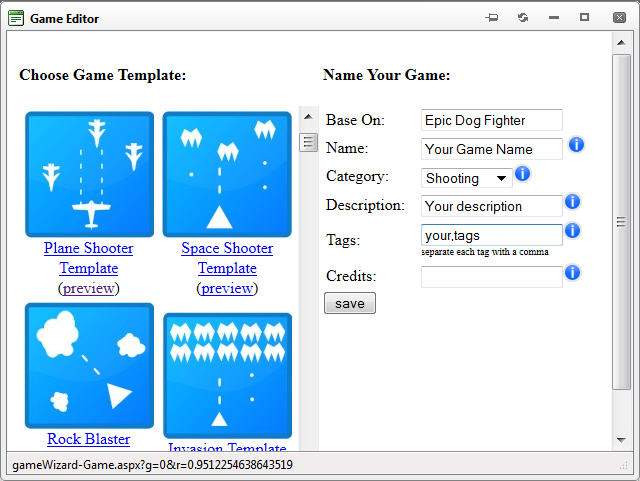
The first thing you should go is go to the Pulado Members area (if you don’t have an account you can sign up to make your own games first) and click the New Game button. Select the “Plane Shooter” template and then fill in the name, description, and tag fields with those items for your game.

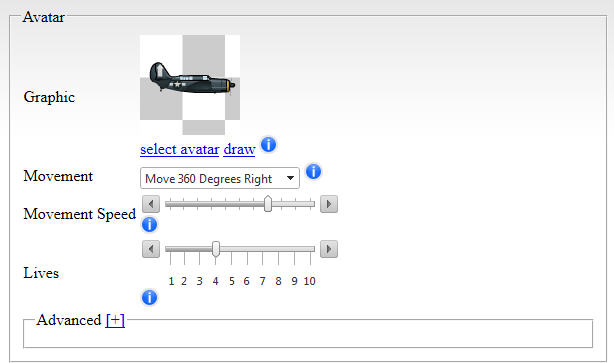
Once you have created your own game using this template you can now select your game from the list and you will be able to preview the existing game.  When you are ready you should click on the Player tab to start tweaking your game. The first options to tweak out are the player character (which in this case is a WWII fighter plane). You can change it to a different avatar or leave it the same. You can also increase or decrease the player movement speed and how many lives they have when they start the game. You can probably ignore the Advanced section for now.

Next up you can configure the weapon #1 and weapon #2 for your fighter plane. Weapon #1 is controlled by the CTRL key and weapon #2 is controlled by the X key. Think of Weapon #1 as your machingun and Weapon #2 as your powerful bomb weapon. In the weapon sections you will have Weapon #1 set to Bullets, the graphic set to some bullet graphics, and you can also configure the rate of fire and projectile velocity. With the Bullets type it will loop the graphic animation over and over until the bullet leaves the play area at which point it will despawn.

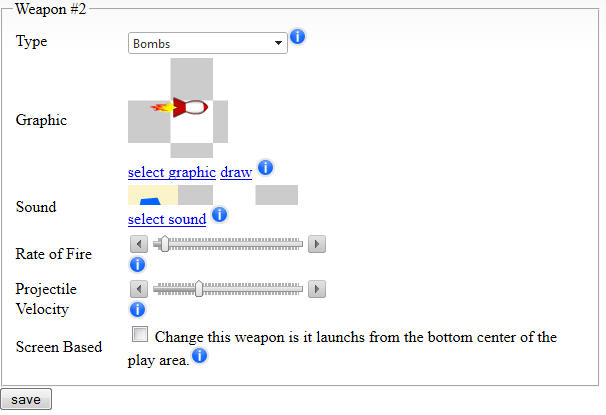
For Weapon #2 you will want to have the Bombs type selected, a bomb graphic selected, and you can set the sound for the bomb. Additionally you can also set the projectile velocity and rate of fire of the bombs as well at this point. When you select the Bombs type it will load the graphic that you select (usually a SWF file) and it will play it until the end of it’s animation at which point it will disappear. After you have made any changes make sure to click the Save button at the bottom to lock in the changes.

Next up you will want to edit your opponents for this shmup game. In this case we have a bunch of different opponent planes. With this game type we have the Complex Falling movement type selected. Complex Falling will use all kinds of different movement types combined together. Each time a different opponent spawns they will get a different movement type to give you a very dynamic game and keep the players on their toes. You can also set the opponent movement speed, how many opponents to start the game with, and how many opponents can be alive at the same time. Once the Max Concurrent Enemies is reached no more will spawn until one despawns (dies or flies off the screen).

Also keep in mind with this section that under the Advanced area you can select One Enemy graphic or Multiple Enemy graphics. If you select Multiple Enemies the engine will randomly choose a frame from the animation and use it as the enemy each time a new enemy is spawned. Within that one keyframe you should have a looping MovieClip. If you have One Enemy selected it will just play that single MovieClip animation repeatedly and spawn it for each enemy. The last piece of information about the Multiple Enemies option is that the last frame in the list of keyframes will be used as the Boss graphic if you turn on Bosses in the Gameplay tab.

The Weapon #1 and Weapon #2 section for the Opponents is pretty much the same as for the player. With the exception that Weapon #2 will fire at angles out to the side of the opponent instead of being a screen clearing bomb like the player’s weapon #2. Again you can configure the rate of fire and projectile velocities of the opponent weapons plus their sounds and graphics in this section if you like.

If you made any changes in the section be sure to click the Save button at the bottom to lock in your new settings. And one of the final things we want to show you which is important for this kind of bullet hell game is the Powerups section.

Click on the Powerups tab in the Pulado game creator and from there you will be able to select which types of powerups you would like the player to be able to collect while they play the game. You can choose from things like rapid fire, multifire, extra lives, and more. You want to make sure that Multifire is selected because that will contribute to your bullet hell game. Each time you pick up a multifire powerup you will start firing an extra stream of bullets (up to 6 or 7 streams). If you die or you pick up some other type of powerup like Rapid Fire you will go back to just one stream of bullets again.
You could also check the boxes for Rapid Fire and Homing powerups if you like to give your game more variety. If you make any changes here click save to lock them in.

That’s it! That is all there is to creating a basic game in the same style as 1942 and other similar scrolling shoot ’em up games. There are of coarse other options you can move on and configure as well like the Background tab where you can customize the look of the background graphics in addition to where, when, and how fast those background graphics will scroll. You can very easily create a parallax using the settings. Also don’t forget about the Gameplay tab where you can configure things like how many hitpoints the player and opponents will have in addition to things like opponent Bosses.

You can now preview, publish, and promote your game. Keep in mind that you can come back at any time and tweak your game (even after it has been published). You game is hosted in the cloud for your convenience. If you haven’t created an account on Pulado.com yet head over there and start making your own shmup game like 1942 right now using our make your own games creator.

Click to create your own games today!